Adding contacts to AinVox helps you streamline communication and manage your connections effectively. This guide will walk you through the process of adding contacts to your account.
Navigate to the Contacts Section
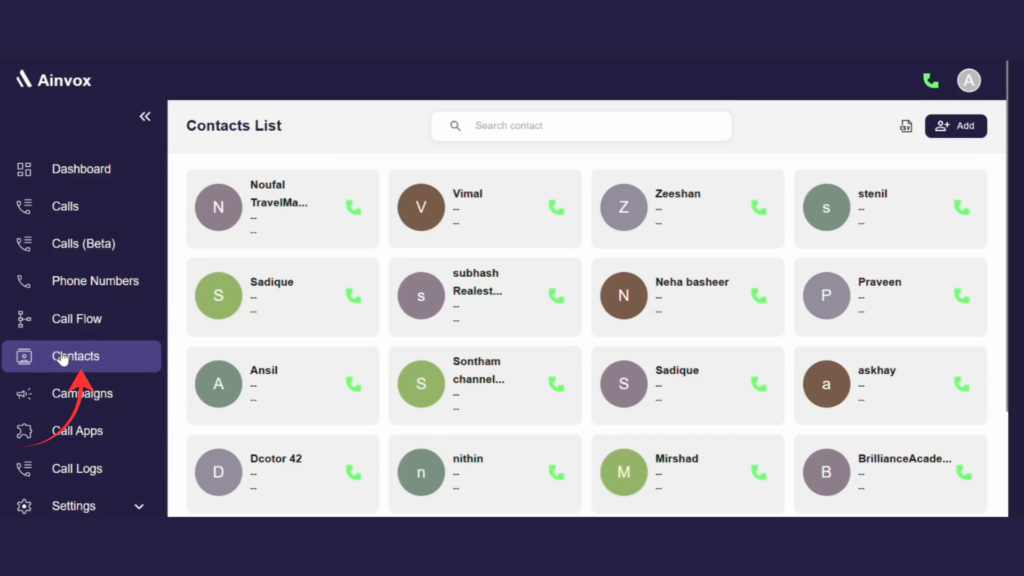
Step 1 :click on the contact option
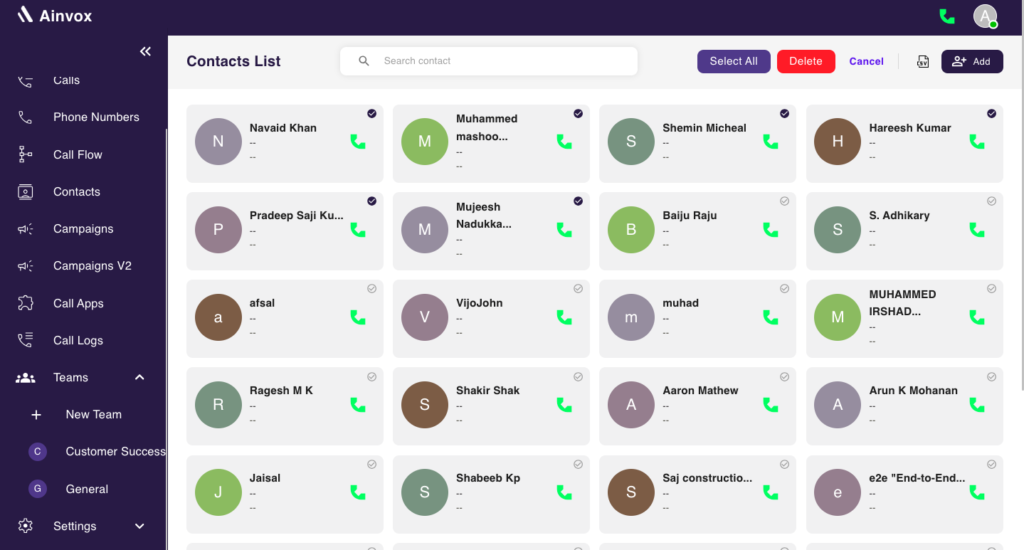
The Contacts option in Ainvox allows you to manage and access all your saved contacts in one place. From this section, you can quickly view, search, add, and call contacts.
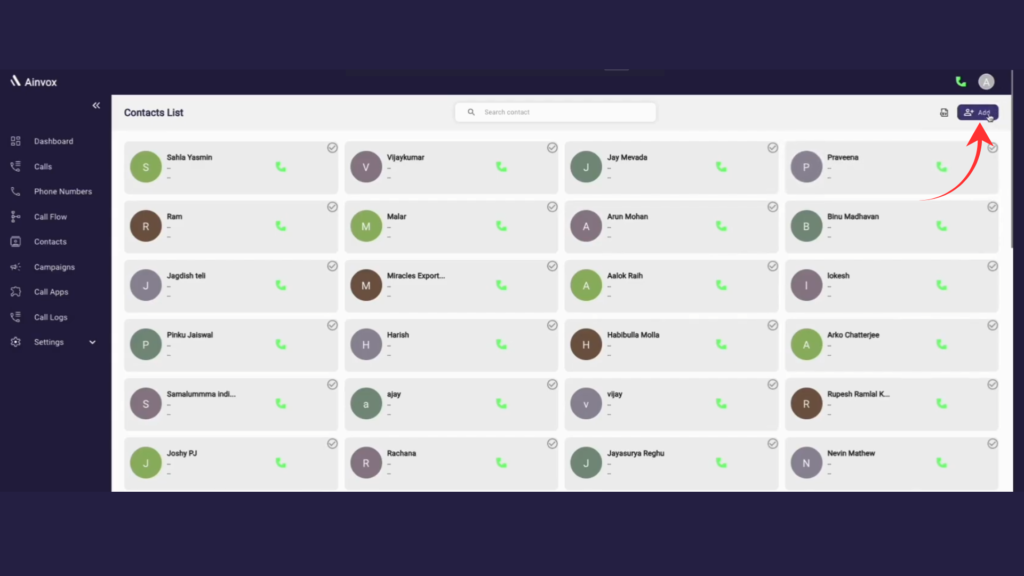
Step 2 : click on the add button to save new customer details
The Add button in the Contacts section allows you to quickly create and save a new contact in Ainvox.
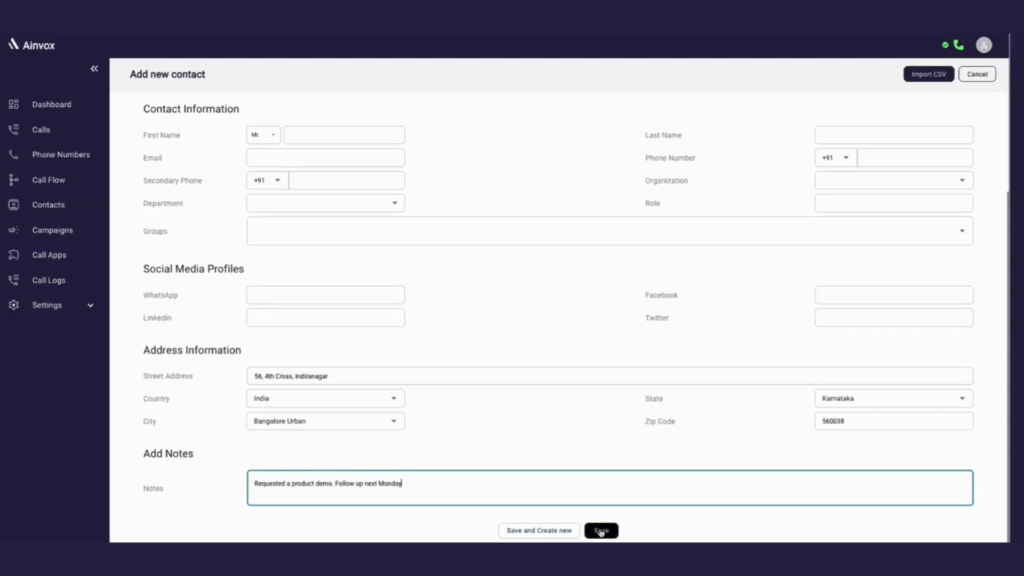
Step 3 : fill in contact information
The Add New Contact page allows you to enter complete contact details, including personal, professional, and address information.
You can fill in the following fields:
Personal & Professional Details:
First Name, Last Name, Email, Phone Number (Primary), Secondary Phone Number (Optional), Organization (Optional), Group (Optional), Department (Optional), Role (Optional).
Social Media Profiles:
LinkedIn, Facebook, WhatsApp, Twitter.
Step 4: click on import csv
The Import CSV option allows you to upload multiple contacts at once using a CSV (Comma-Separated Values) file. This feature saves time when adding bulk contacts instead of entering them manually.

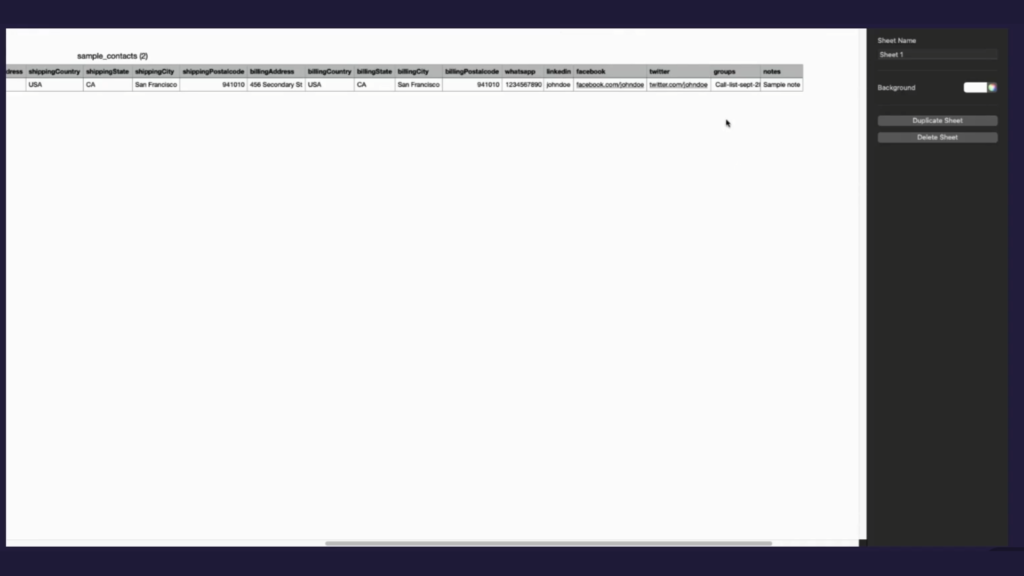
Step 5 : downlode csv file
This is the sample_contacts (2) CSV file format. All contact data must be entered in this structure before uploading to ensure successful import into Ainvox.
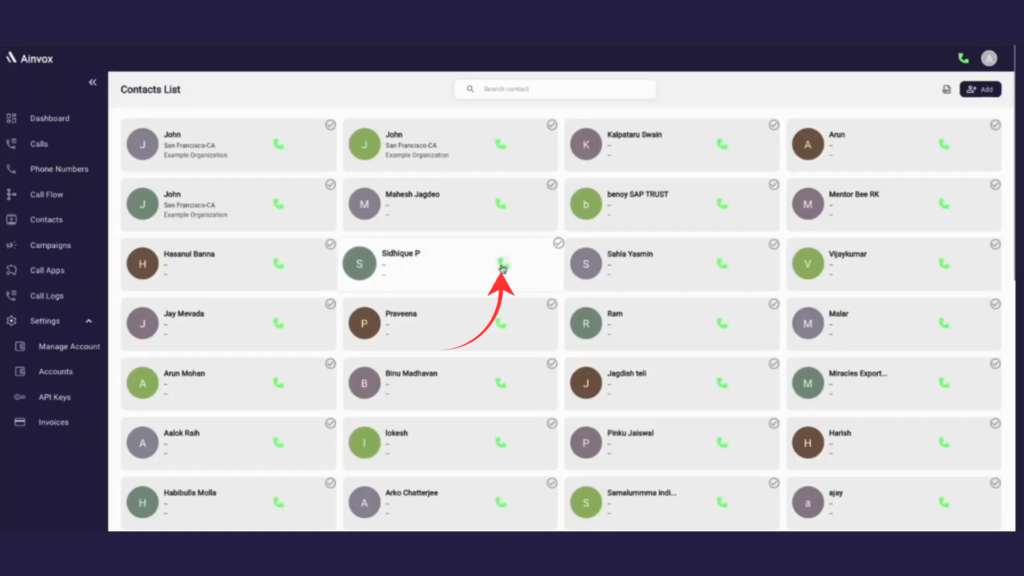
Step 6 : click on the call option
The Call option (green phone icon) in the Contacts List allows you to instantly place a call to any saved contact directly from the dashboard.
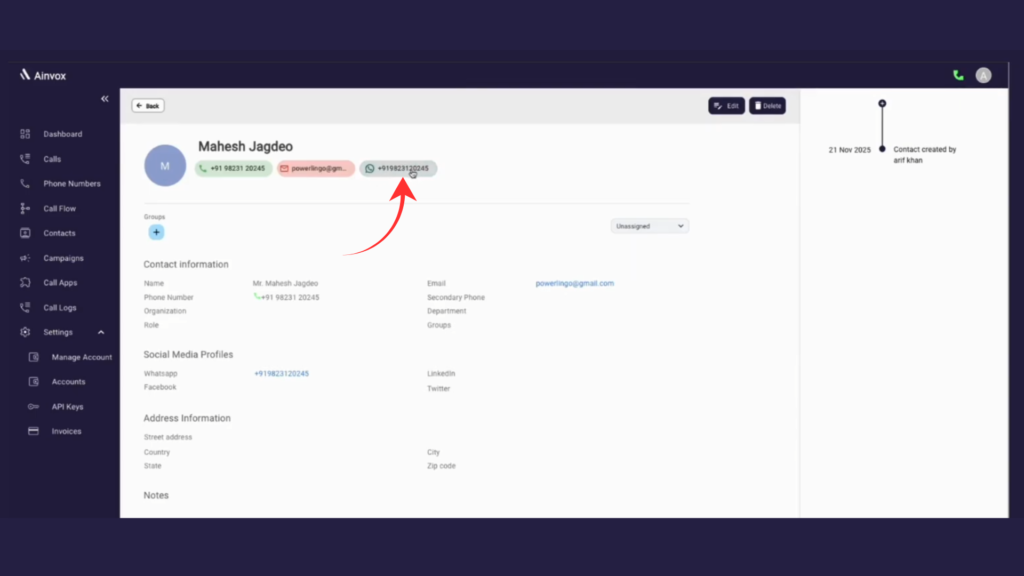
Step 7 : click on the whatsapp option
The WhatsApp option in the Contact Profile allows you to quickly connect with the contact through WhatsApp using the saved mobile number.
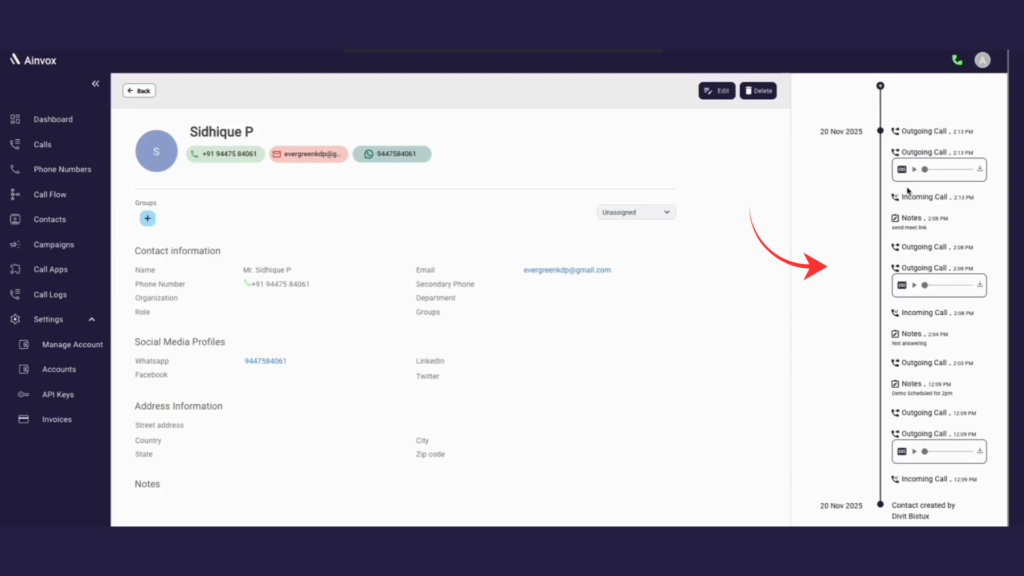
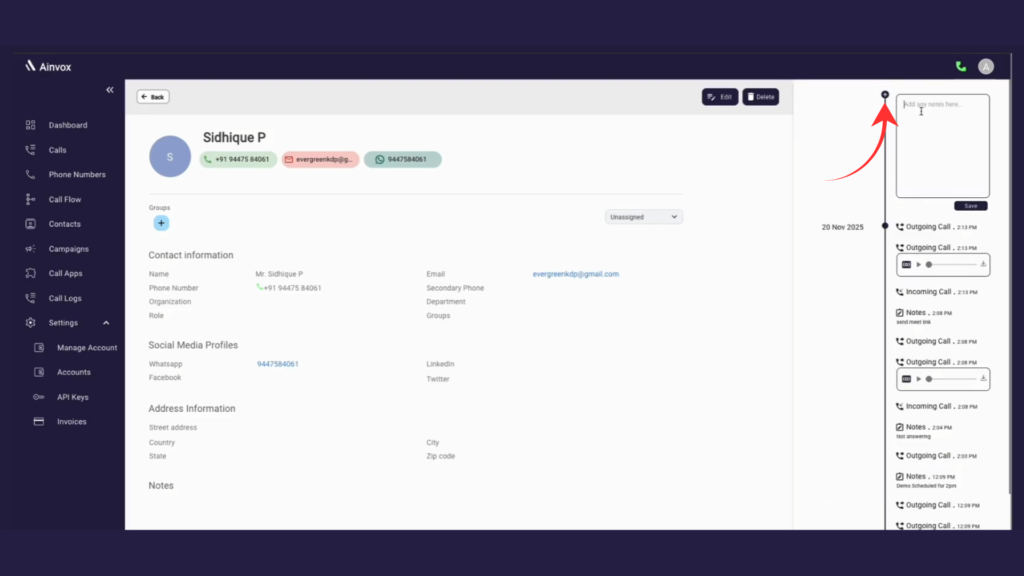
Step 8 : Contact Activity Timeline.
The Contact Activity Timeline provides a complete, time-based history of all interactions and updates related to a specific contact. It helps you track every communication and action in one organized view.
Step 9: you can add notes here
The Add Notes option in the Contact Activity Timeline allows you to record important information related to a specific contact. This helps track follow-ups, discussions, and important updates.
Step 10: Contact Deletion
The Select Contacts feature allows you to easily manage your contact list by removing unwanted entries. You can select contacts individually to delete them one by one, or use the Select All option to quickly mark multiple contacts at once. Once selected, simply click Delete to remove them from your list and keep your contact section clean, organized, and up to date.
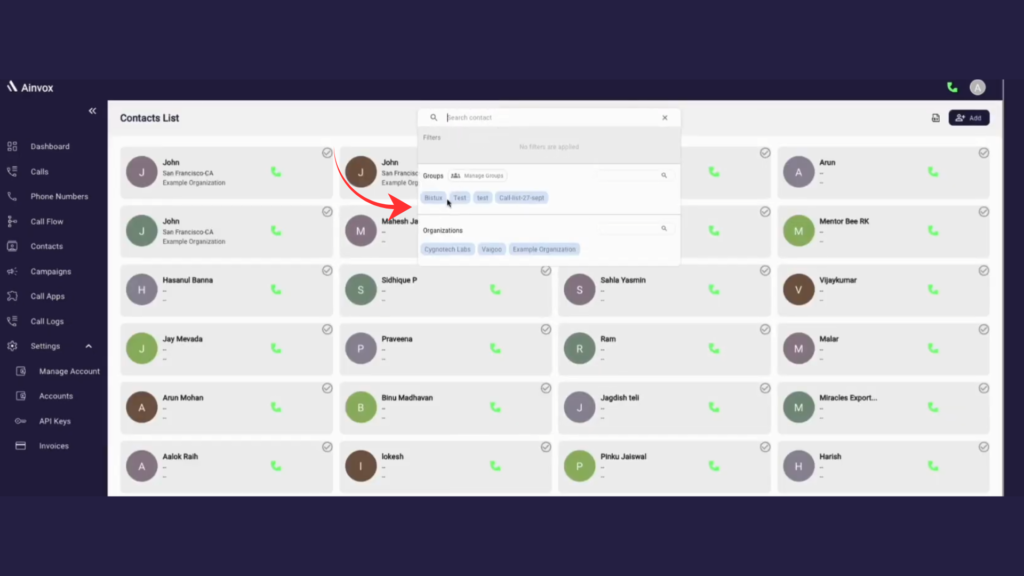
Step 11 : click on searche contact
The Search Contact option helps you quickly find specific contacts from the Contacts List without scrolling through the entire list.
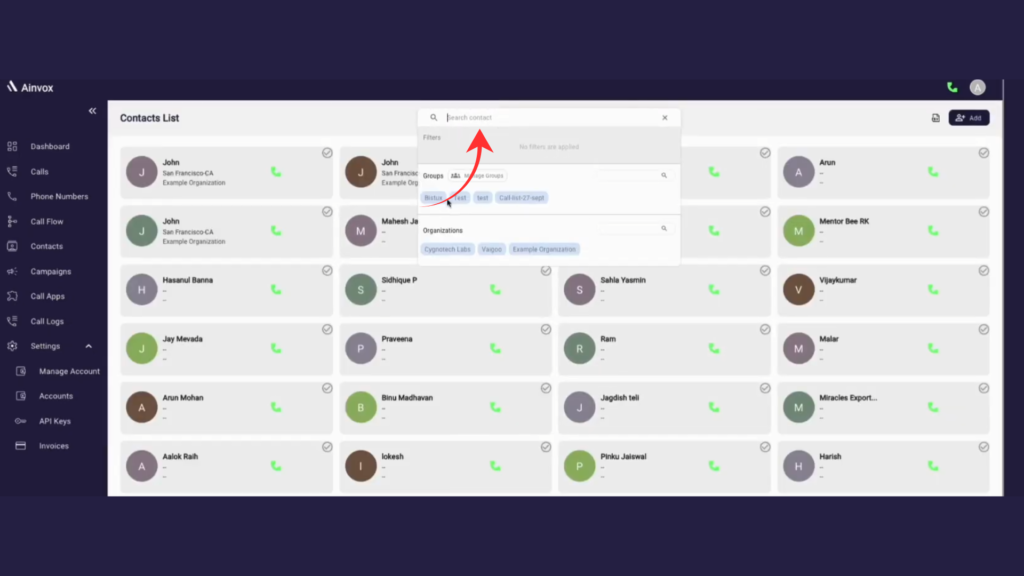
Step 12: filter by group and organisation
The Filter by Group and Organization option in the Search Contact section helps you quickly narrow down contacts based on specific categories.