Call flows are essential for managing incoming calls effectively, ensuring that customers reach the right department or agent. Here’s how to set up and use call flows:
Step 1: Access the Call Flow Section
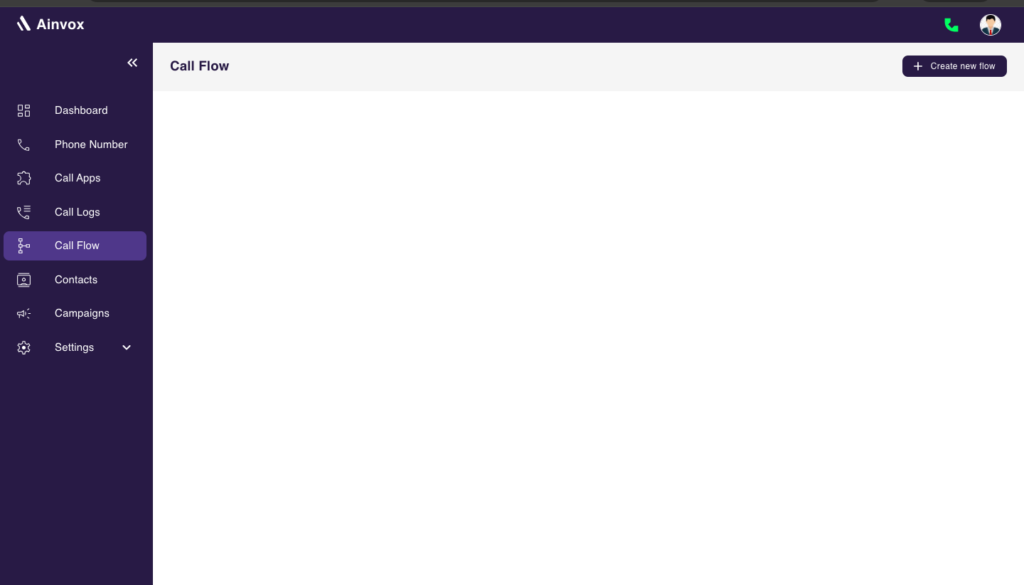
- Log in to your Ainvox account and navigate to the Call Flow section on the left sidebar of the dashboard.
Step 2: Create a New Call Flow
- Click on the Create New Call Flow button. This will open a template where you can customize your call flow.

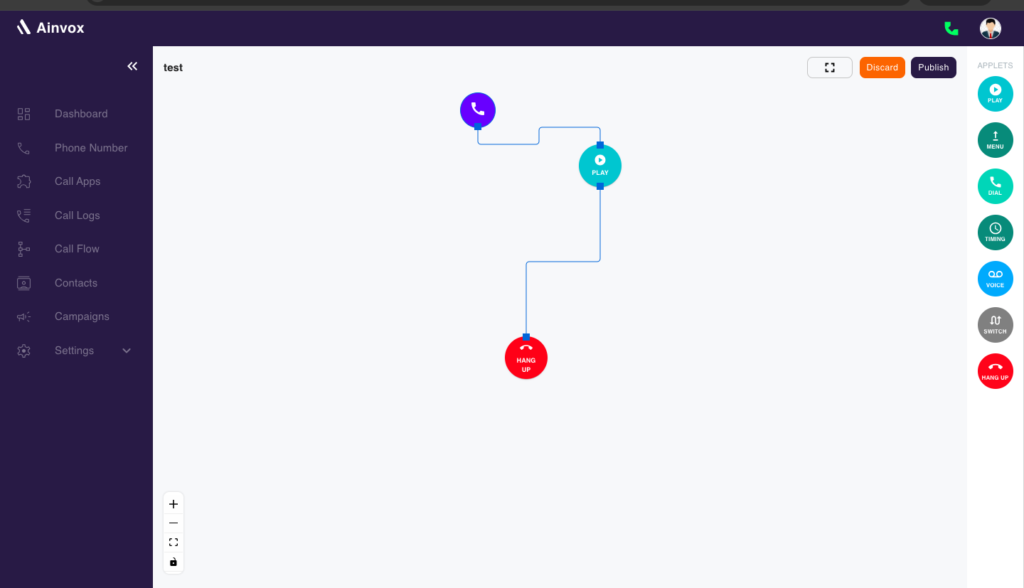
Define the Call Flow Structure
- Choose Call Flow Type: Select the type of call flow you want to create.
- Add Steps: Use drag-and-drop features to add various steps like greetings, options, and routing to your call flow.
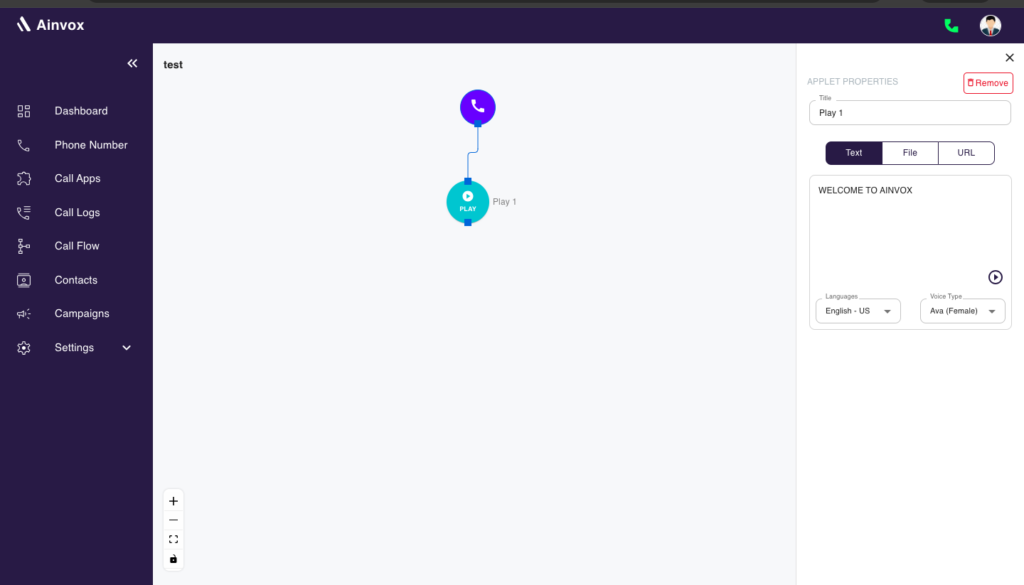
1- Play Applet
The Play applet allows you to play audio files or messages to callers. This is essential for greetings, announcements, or important information.
- Use Case: Welcome callers with a friendly greeting or provide instructions on how to navigate the call flow.
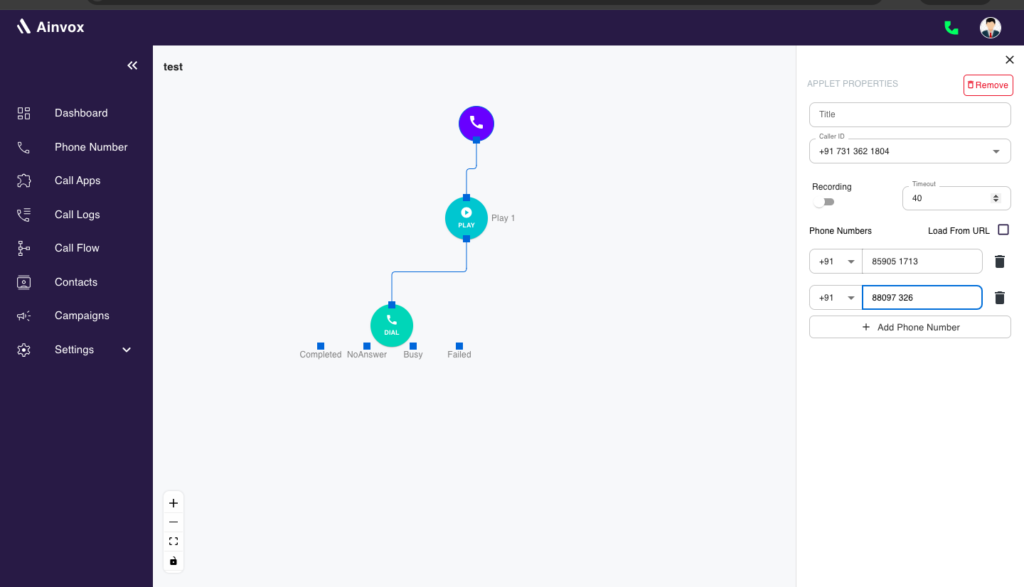
2. Dial Applet
The Dial applet is essential for connecting callers to specific phone numbers or agents and managing various call outcomes effectively. It allows you to handle scenarios such as:
- Complete: When the call is successfully connected, the caller can communicate with the intended recipient. This is the desired outcome for effective communication.
- No Answer: If the recipient does not answer the call, you can configure follow-up actions, such as redirecting the caller to voicemail, sending a notification to the recipient, or routing the call to a different available agent.
- Failed: If the call fails due to reasons such as a wrong number or technical issues, the applet can trigger alternative actions. This may involve notifying the caller with an error message and offering options to retry or connect to another department.
- Busy: If the line is busy, you can set the applet to provide options to the caller, such as waiting in a queue, leaving a message, or connecting to another available agent.
Additionally, the Dial applet allows you to specify the Caller ID that displays on the recipient’s phone, giving you the flexibility to maintain branding or anonymity as needed. You can also input multiple phone numbers to enable routing to various agents or departments, enhancing overall call management and customer service efficiency.
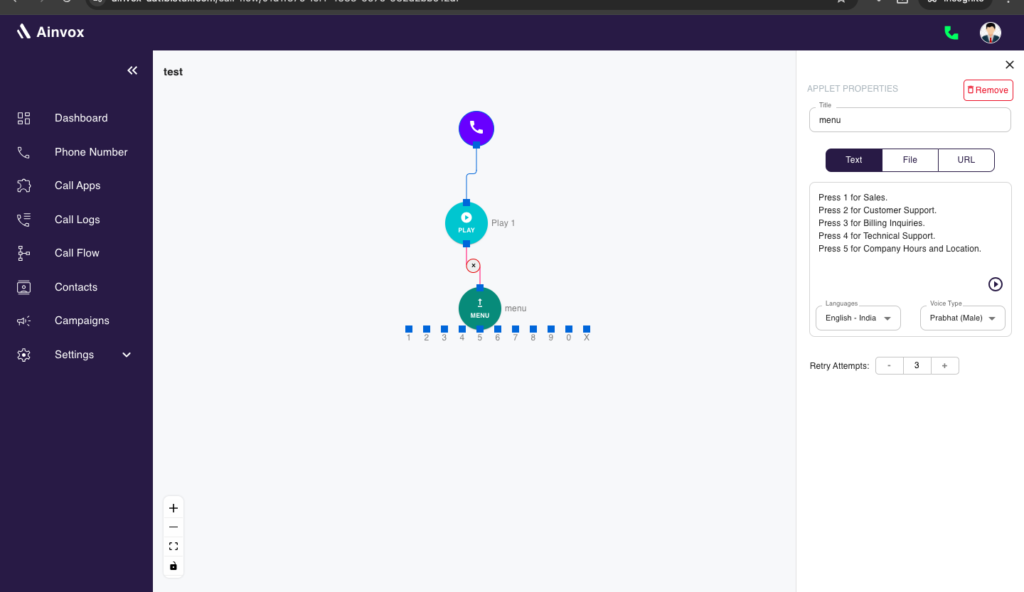
3. Menu Applet
The Menu applet provides callers with options to choose from. This helps in directing calls to the appropriate destination.
- Use Case: Create an interactive menu where callers can press keys to reach different departments (e.g., Press 1 for Sales, Press 2 for Support).
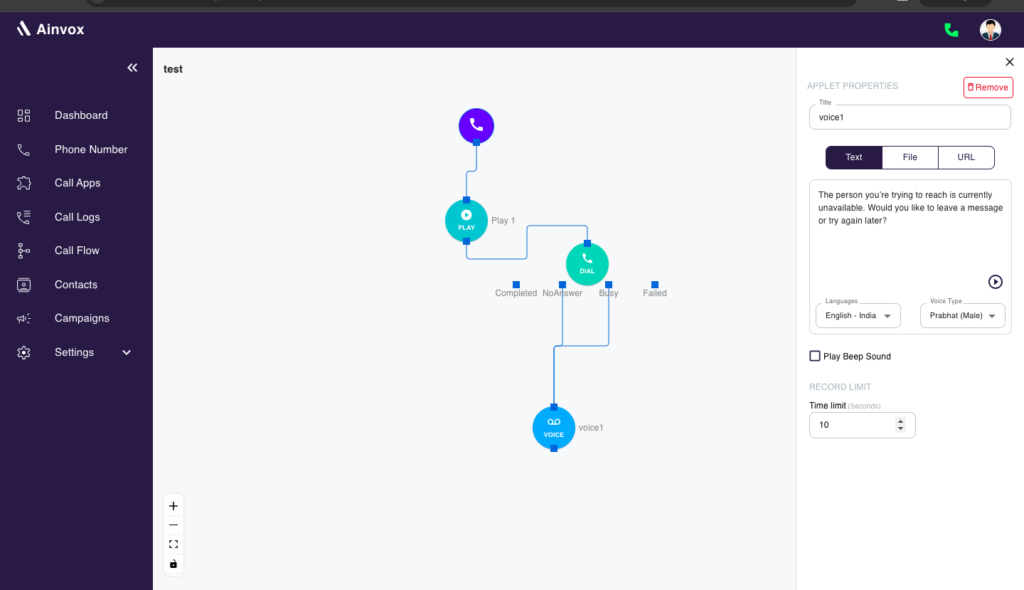
4. Voice Applet
The Voice applet allows for voice recognition, enabling callers to interact using their voice rather than pressing keys.
- Use Case: Implement a more natural interaction where callers can say their choice (e.g., “Sales” or “Support”) instead of pressing numbers.
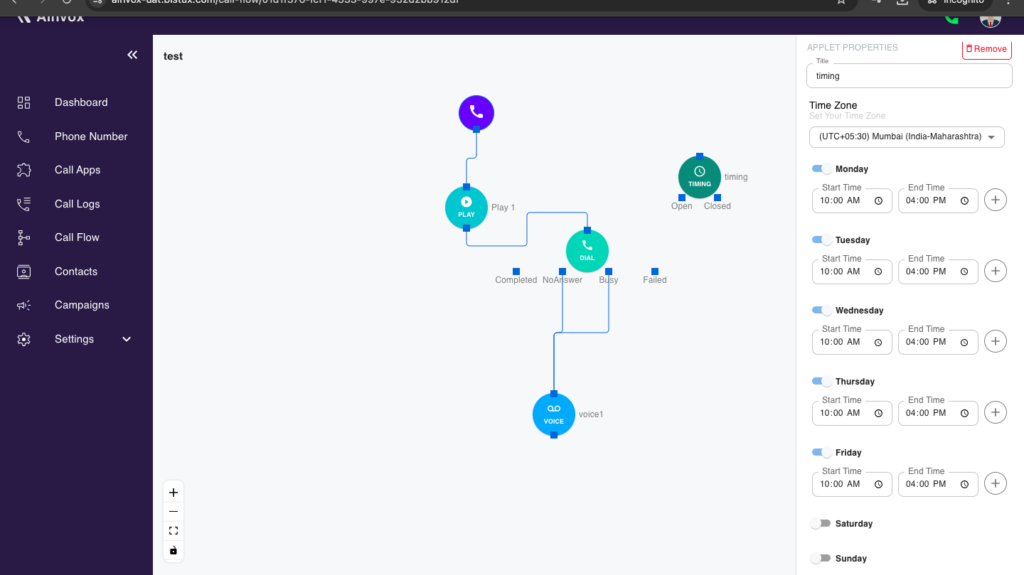
5. Timing Applet
The Timing applet allows you to schedule specific actions within your call flow based on different time conditions. This is especially useful for managing calls during business hours, after-hours, weekends, or holidays.
With the Timing applet, you can:
- Set Business Hours: Define working hours during which calls are routed to live agents or specific departments. Outside of these hours, calls can be routed to voicemail or a different department.
- Schedule Multiple Time Slots: You can schedule different time slots for various scenarios. For example, route calls to customer support during the day, and redirect them to a backup team or automated service during the night.
- Handle Special Events or Holidays: Use the applet to automatically adjust call routing during holidays, vacations, or special events. You can provide custom messages and alternate call flows based on specific dates.
- Time-Based Call Routing: The applet allows you to create different call paths depending on the time of the call, ensuring the right resources are allocated at the right time.
By scheduling various times with the Timing applet, you can ensure efficient call handling 24/7, improving both customer service and internal operations.
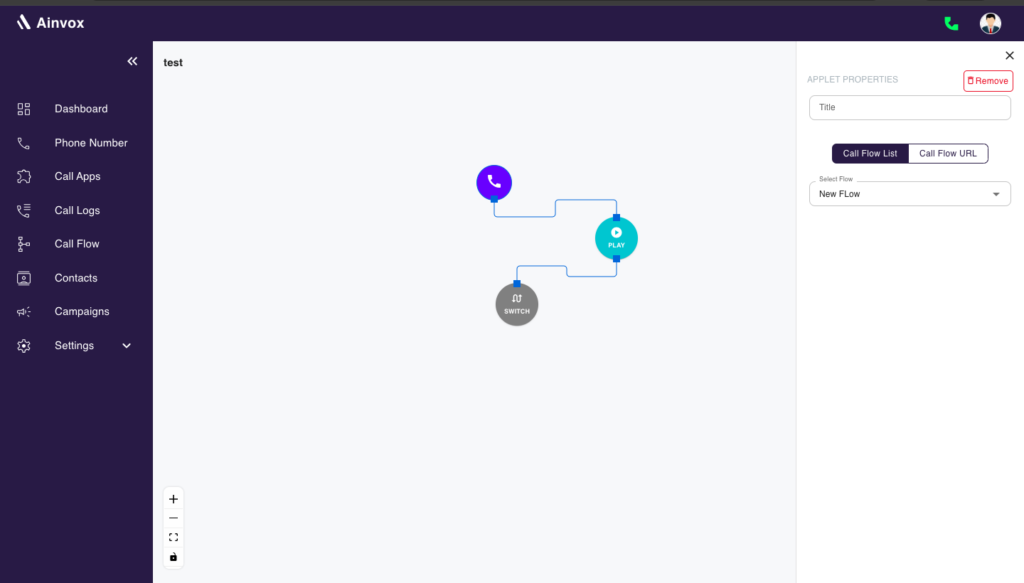
6. Switch Applet
The Switch applet is a powerful tool that allows you to direct calls to a different call flow based on specific conditions. This provides flexibility in managing complex call scenarios.
Here’s how the Switch applet can be used:
- Switch Between Call Flows: Based on predefined conditions, such as the time of day, caller input, or call status, the applet allows you to switch the caller to an entirely different call flow. For example, during business hours, the call may be routed through a primary flow, but after-hours, the switch applet can redirect it to a different flow with an automated message or voicemail.
- Conditional Call Routing: The Switch applet can also route calls differently depending on certain criteria, such as the caller’s area code, the department they are trying to reach, or the priority of the call.
- Efficient Flow Management: By switching to another call flow, you can better manage call traffic, ensuring that calls are handled in the most efficient way based on real-time conditions.
This flexibility ensures that the right call flow is activated at the right time, optimizing customer experience and resource allocation.
7. Hangup Applet
The Hangup applet ends the call. It is essential for ensuring that calls are properly terminated.
- Use Case: Use this applet to gracefully conclude calls after providing the necessary information or when the caller has finished their inquiries.
Step 3: Create a New Call App
- After creating the call flow, go to the Call App section and click on Create New Call App.
- Provide the necessary details, such as App Title, Description, and select the Call Flow you’ve just created.
Step 4: Assign Call App to Virtual Phone Number
- Once the call app is set up, navigate to the Phone Number section.
- Select the virtual phone number you wish to assign the app to, click on the Edit option, and link the newly created call app to the number.
- Save the changes, and now your virtual phone number is connected to the call app and ready to handle incoming calls.